How Can I Remove Background Noise From Audio?


You've just finished recording an important podcast, interview, or voiceover, and there's one problem: persistent background noise is ruining your audio quality. Whether it's ambient traffic, fan hum, or room echo, unwanted noise can make even great content sound unprofessional.
The good news is that removing background noise is entirely achievable. In this guide, we'll walk you through both traditional methods and modern AI-powered solutions so you can choose the approach that best fits your workflow and technical comfort level.
The challenge is that not all background noise is created equal. Some recordings have subtle hum, others have layered ambient sound, and some combine both. A quick diagnosis upfront makes the rest of the process much simpler.
Diagnose your noise first (30 seconds)
Before you touch any tools, listen for what the noise is doing. This tells you which approach will work and what will waste your time.
Is the noise steady the whole time, like a fan or AC?
This is continuous ambient noise. It's usually the easiest type to reduce because it's consistent.
Does it spike in bursts, like barking, door slams, or notifications?
This is intermittent noise. It's harder to remove cleanly when it overlaps with speech because it's not consistent.
Is it a low hum or buzz that feels electrical?
This is often 50/60 Hz power hum plus harmonics. It usually needs frequency-targeted removal, not just generic noise reduction.
Is it a hiss or static crackle?
This is high-frequency noise, often from gain, cables, or a noisy preamp. It can be reduced, but aggressive settings can make voices sound thin or processed.
Was it recorded outdoors?
Outdoor recordings often combine multiple noise types, and wind can create low-frequency rumble that standard noise reduction misses. Prevention matters more outdoors, but you can still improve a lot in post.
What is usually easiest to remove (and why)
- Easier: steady, continuous noise. It's predictable, so tools can learn what to subtract.
- Harder: intermittent noise bursts and anything overlapping speech. Removing it without damaging the voice is the tricky part.
- Often the toughest: wind rumble and severe recordings where the voice is quieter than the noise. You can still improve them, but the ceiling is lower.
If your noise is very specific
Sometimes what you're trying to remove isn't general background noise. It's a specific problem with its own best fix.
If you're recording outdoors, reducing background noise when recording outdoors starts with prevention, but it also helps you understand which noises are realistic to remove after the fact.
Outdoor audio often improves a lot just from small changes in location, mic placement, and wind protection. That is still true even when you plan to clean up the recording in post.
If wind rumble is the main issue, removing wind noise uses a different approach than general noise reduction.
If the interruption is intermittent, like barking that cuts in and out, removing dog barking is mostly about targeting bursts without damaging speech.
Method 1: Manual noise removal with Audacity
What you'll need:
- Audacity (free, open-source audio editor)
- A few minutes of your time
- Patience with the learning curve
The traditional approach
Audacity is one of the most popular free audio editing tools, and its noise reduction feature is surprisingly effective when used correctly. Here's how it works:
Step 1: Import your audio
Open Audacity and drag your audio file into the workspace, or go to File > Open to load your recording.
Step 2: Select a noise profile
This is the critical step many beginners miss. You need to tell Audacity what "noise" sounds like by selecting a 1-3 second section of your recording that contains only background noise, with no voice or desired audio.
- Highlight a silent moment or section with just ambient noise
- Go to Effect > Noise Reduction
- Click "Get Noise Profile"
Audacity now has a reference point for what to remove.
Step 3: Apply noise reduction
- Select all your audio (Ctrl+A on Windows, Cmd+A on Mac)
- Go to Effect > Noise Reduction again
- Adjust the three sliders:
- Noise reduction amount (typically 6-12 dB for moderate noise)
- Sensitivity (controls how aggressively it detects noise)
- Frequency smoothing (prevents artifacts)
- Click "Apply"
The reality check
While Audacity's noise reduction works, it has significant limitations:
- Time-consuming: You must manually select the noise profile every time
- Quality trade-offs: Aggressive noise reduction can remove high frequencies from your voice, making it sound hollow or robotic
- Requires trial and error: Finding the right slider balance takes experimentation
- One-size-fits-all problem: Different recordings with different noise profiles require different settings
- Limited effectiveness on specific noise types: Works best on continuous ambient noise, but struggles with intermittent bursts, electrical interference, or noise that overlaps heavily with your voice
For hobbyists or occasional users, this method is free and functional. For professionals or high-volume content creators, the manual process becomes a bottleneck.
If you're dealing with electrical hum, Audacity can work, but you will often get better results with frequency-targeted steps. Our guide on removing buzzing or humming noise goes deeper into the common causes and the cleanest fixes.
If what you hear is hiss or static rather than room noise, removing hissing or static sounds usually requires a slightly different approach than basic noise reduction.
Method 2: AI-powered automatic noise removal
The modern alternative
AI-powered noise removal tools eliminate the manual complexity entirely. Instead of wrestling with profiles and sliders, the AI analyzes your audio and removes noise automatically while preserving voice clarity.
How it works
Tools like AudioEnhancer.com use machine learning trained on thousands of hours of audio to distinguish between desired sound (your voice) and unwanted noise (background hum, traffic, etc.). The algorithm then intelligently removes the noise without the quality degradation that manual methods often introduce.

Key advantages:
- Instant results: Upload, process, download with no manual configuration required
- Professional quality: Preserves voice warmth and natural tone
- Batch processing: Handle multiple files without repeating steps
- Consistent output: Same quality across all recordings, regardless of the noise type
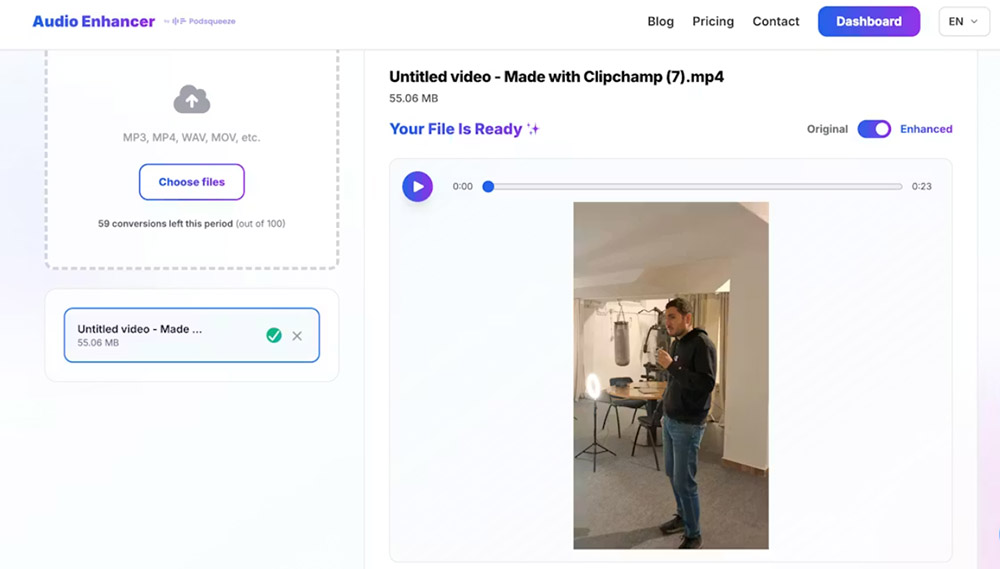
AudioEnhancer.com works effectively even with severe background noise that runs constantly throughout a recording. The platform handles both audio and video files, making it useful for cleaning up podcast recordings, video content, or interviews where background noise is problematic. The processing maintains natural voice characteristics while removing noise, even in cases where traditional manual methods struggle.
The platform is particularly effective at handling multiple noise types simultaneously. If your recording has continuous ambient noise plus intermittent interruptions, or if you're dealing with both environmental noise and electrical interference, AI tools can address all of these in a single processing pass. This is especially valuable for outdoor recordings where you might have traffic noise, wind rumble, and electrical interference all present in the same file.
When to use each method:
| Factor | Audacity | AI Tool |
|---|---|---|
| Cost | Free | Paid (often) |
| Learning curve | Steep | Minimal |
| Speed | 10-15 min per file | 2-3 minutes |
| Quality | Good (with effort) | Excellent (automatic) |
| Best for | Occasional, simple noise | Professional content |
Comparing the workflows
Audacity workflow:
- Import audio → 2. Find silent section → 3. Get noise profile → 4. Select all audio → 5. Apply effect → 6. Adjust sliders → 7. Export
AI tool workflow:
- Upload audio → 2. Click process → 3. Download cleaned audio
The difference is stark when you're handling multiple recordings per week.
Best practices for noise removal
Regardless of which method you choose:
-
Start with prevention: Record in quiet environments whenever possible. The less noise to remove, the better the final result. For outdoor recordings, choose locations away from traffic and use proper wind protection.
-
Identify your noise type: Understanding whether you're dealing with continuous ambient noise, intermittent bursts, electrical interference, or a combination helps you choose the right removal method.
-
Preserve quality: Don't over-process. A little background noise is often more acceptable than artificially-sounding audio. Start with conservative settings and increase gradually if needed.
-
Use headphones during review: Play back through quality headphones to catch artifacts or over-processing that speakers might mask. Headphones reveal subtle problems that could distract listeners.
-
Archive originals: Always keep an unprocessed backup of your raw recording. This lets you try different approaches or start over if processing introduces unwanted artifacts.
-
Test on short clips: Before processing your entire recording, test your settings on a 10-15 second sample that contains both noise and your desired audio. This helps you find the right balance between removal and naturalness.
When standard methods aren't enough
Sometimes background noise is so severe or complex that you might wonder if it's even fixable. In most cases, AI-powered tools like AudioEnhancer.com can handle multiple noise types simultaneously, including severe background noise, electrical interference, intermittent bursts, and even vocal artifacts like plosives and mouth clicks. If you're dealing with complex noise and don't have technical audio engineering knowledge, start by trying an AI tool first. It's designed to handle these situations automatically.
If AI doesn't fully solve it
For the rare cases where a single AI pass doesn't clean everything, you can combine approaches. Start with AI tools to handle the majority of noise automatically, then use manual editing in Audacity to clean up any remaining artifacts or target specific problematic sections. This two-stage approach often produces better results than aggressive single-pass processing.
Address specific noise types separately
If your recording has multiple distinct noise types and you prefer manual control, you might address them separately. For example, if you have both electrical humming and intermittent dog barking, you could use frequency-specific tools for the hum and manual editing or AI tools for the barking. However, for most users, especially those without technical audio knowledge, AI tools that handle everything in one pass are the more practical choice.
Consider re-recording
If noise is so severe that removal attempts create artifacts or make dialogue unintelligible, re-recording with proper prevention measures might be more efficient than extensive post-production. This is especially true for scripted content where you control the recording environment.
Conclusion
Removing background noise is no longer a barrier to producing professional audio content. Whether you choose the traditional Audacity route or embrace AI-powered automation, you now have practical paths forward.
For one-off recordings or learning purposes, Audacity delivers solid results at no cost. For creators who produce content regularly, such as podcasters, YouTubers, and interviewers, AI-powered solutions eliminate repetitive manual work and deliver consistently professional audio in minutes.
The goal isn't perfection; it's clarity. Choose the method that fits your workflow, and your audience will notice the difference immediately. Remember that different noise types require different approaches, and understanding what you're dealing with is the first step toward effective removal.