How Can I Remove Wind Noise From Audio?


You're recording an interview on a windy beach, capturing footage at an outdoor event, or documenting a field report when you notice it: that low rumble and whooshing sound that makes your audio sound like it was recorded inside a wind tunnel. Wind noise is one of the most frustrating audio problems for outdoor recordings, and it's different from typical background noise in ways that require specific removal techniques.
The good news is that wind noise can be removed or significantly reduced, even after recording. This guide covers both prevention strategies and post-production solutions, from manual editing techniques to AI-powered tools that handle wind noise automatically.
What makes wind noise different
Wind noise isn't just background sound. It's created when air turbulence hits the microphone diaphragm directly, producing low-frequency rumble and distortion that can overpower your voice. Unlike traffic noise or room echo, wind noise sits primarily in frequencies below 200-300 Hz, which means standard background noise removal tools often miss it or require different settings.
Understanding this frequency characteristic is crucial because it determines which removal methods work best. A high pass filter targeting low frequencies will catch wind noise that traditional noise reduction might ignore.
Prevention: stopping wind noise before it starts
The most effective way to deal with wind noise is to prevent it during recording. While you can't control the weather, you can control how your microphone interacts with moving air.
Use a windscreen or deadcat
Professional microphones come with foam windscreens, but for outdoor recording, you need something more substantial. A "deadcat" or "furry" windscreen is a larger, furry cover that breaks up wind before it reaches the microphone capsule. These are essential for any outdoor recording where wind is a possibility.
Position yourself strategically
If you're recording outdoors, position yourself with your back to the wind whenever possible. This simple technique reduces direct wind impact on your microphone. You can also use your body or nearby objects as natural windbreaks.
Choose the right microphone
Some microphones are more wind-resistant than others. Shotgun microphones with built-in wind protection, or dynamic microphones with tighter pickup patterns, handle wind better than sensitive condenser microphones. If you're planning regular outdoor work, investing in wind-resistant equipment pays off.
Monitor while recording
Wear headphones during outdoor recording to catch wind noise in real-time. If you hear that telltale rumble starting, you can adjust position, add more wind protection, or wait for a calmer moment to record critical dialogue.
Method 1: High pass filter in Audacity
Why high pass filters work for wind noise
Since wind noise lives in low frequencies, a high pass filter that cuts everything below a certain frequency point can remove most wind rumble while preserving your voice. Human speech contains important frequencies starting around 80-100 Hz for male voices and 150-200 Hz for female voices, so you can safely cut below these ranges.
Step-by-step process
Open your audio file in Audacity and select the entire track. Go to Effect > High Pass Filter. Set the cutoff frequency between 80-150 Hz depending on your voice type. Start conservative, around 100 Hz, and listen to the result. If wind noise persists, you can increase the cutoff slightly, but going too high will make voices sound thin.
Apply the filter and review the result. You should notice the low rumble disappearing while your voice remains clear. If the voice sounds unnatural, lower the cutoff frequency and try again.
Limitations of high pass filtering
While effective, high pass filters are blunt instruments. They remove all low frequencies, not just wind noise, which means you'll lose bass in music, natural room tone, and the warmth in voices. For recordings where you want to preserve natural low-end content, this method requires careful balancing.
Method 2: Spectral editing for precise removal
When you need surgical precision
For severe wind noise that high pass filters can't fully eliminate, spectral editing lets you target specific frequency bands where wind noise appears. This is more time-consuming but gives you control over exactly what gets removed.
In Audacity, use the Spectral Selection tool to visualize your audio's frequency content. Wind noise typically appears as continuous low-frequency energy. You can select these specific bands and reduce their gain, or use the Spectral Subtraction effect to remove them while preserving surrounding frequencies.
This method works best when wind noise is intermittent or when you need to preserve low-frequency content in other parts of your recording. The trade-off is the time investment required to manually identify and remove wind noise sections.
Method 3: AI-powered wind noise removal
Automatic detection and removal
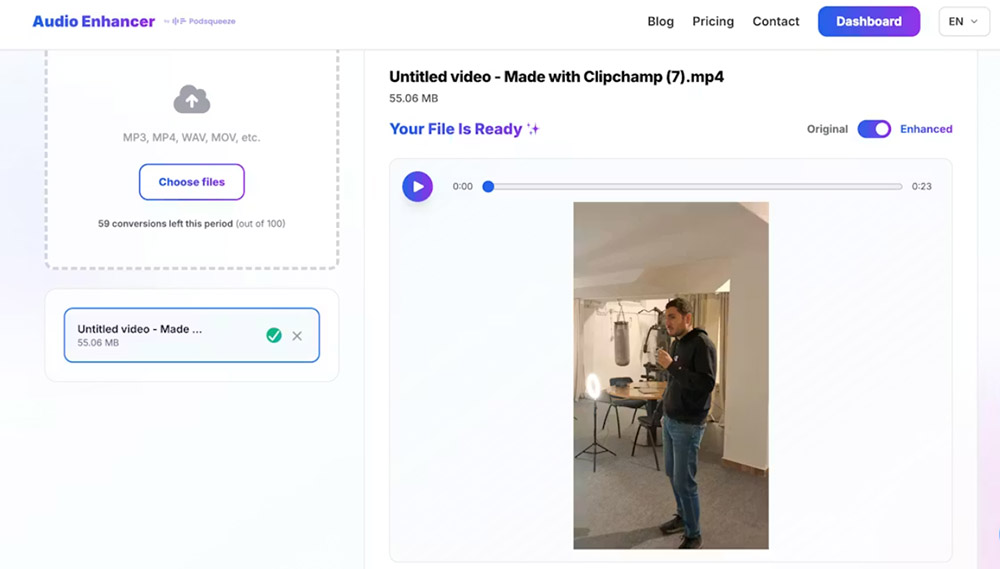
AI-powered audio enhancement tools can identify and remove wind noise automatically without the frequency trade-offs of manual filtering. Tools like AudioEnhancer.com use machine learning trained on thousands of hours of audio to distinguish between wind noise and desired low-frequency content like voice warmth or musical bass.

The advantage is speed and consistency. Upload your file, and the AI analyzes the entire recording, removing wind noise while preserving the natural character of voices and other audio elements. The simple upload interface makes it easy to process files quickly without complex configuration. This is particularly valuable when you have multiple files to process or when wind noise appears inconsistently throughout a recording.
When AI tools excel
AI wind noise removal works best when the original voice recording is clear and the wind noise is the primary problem. If your recording has multiple issues, such as wind noise plus echo and background traffic, tools like AudioEnhancer.com can handle them simultaneously, which would require multiple manual steps in traditional editing. The platform works effectively even with severe wind noise that creates constant low-frequency rumble throughout a recording, removing it while maintaining natural voice characteristics. For general background noise removal techniques that work alongside wind noise reduction, see our comprehensive guide. For prevention strategies when recording outdoors, see our guide on reducing background noise when recording outdoors.
For content creators producing regular outdoor content, AI tools eliminate the repetitive manual work of filtering and spectral editing. The processing happens automatically, and you get consistent results across all your recordings regardless of wind conditions during capture. AudioEnhancer.com works with both audio and video files, making it useful for cleaning up outdoor video content where wind noise appears.
Comparing removal methods
Each method has strengths depending on your situation:
| Factor | High Pass Filter | Spectral Editing | AI Tool |
|---|---|---|---|
| Speed | Fast (2-3 min) | Slow (15-30 min) | Very fast (2-3 min) |
| Quality | Good (may thin voice) | Excellent (precise) | Excellent (automatic) |
| Learning curve | Low | High | Minimal |
| Cost | Free | Free | Paid (often) |
| Best for | Quick fixes, simple cases | Complex recordings | Regular production |
The choice depends on your workflow, technical comfort level, and how often you deal with wind noise. For occasional outdoor recordings, manual filtering might be sufficient. For regular outdoor content creation, AI tools save significant time while delivering professional results.
Combining methods for severe cases
When wind noise is extreme, you might need to combine approaches. Start with a gentle high pass filter to remove the worst rumble, then use AI tools or spectral editing to clean up remaining artifacts. This two-stage approach preserves more natural audio character than aggressive single-pass filtering.
The key is starting conservative and building up. Apply a light high pass filter first, listen to the result, then decide if additional processing is needed. Over-processing can make audio sound artificial, and sometimes a small amount of remaining wind noise is more acceptable than heavily processed audio.
Best practices for outdoor recording
Plan for wind conditions
Check weather forecasts before outdoor recording sessions. If high winds are predicted, consider rescheduling or bringing extra wind protection. Even with post-production tools, preventing wind noise is always easier than removing it.
Record backup takes
When recording critical dialogue outdoors, capture multiple takes. Wind conditions can change between takes, and having options gives you the best chance of getting clean audio. You can also record a few seconds of "room tone" with just wind noise, which helps with noise profiling if you're using manual removal methods.
Monitor audio levels
Wind noise can cause sudden level spikes that distort your recording. Keep an eye on your input levels and use a limiter or compressor if your recording device supports it. This prevents distortion that can't be fixed in post-production.
Test your setup
Before important outdoor recordings, test your microphone and wind protection in similar conditions. This helps you identify problems before you're committed to a recording session. Small adjustments to microphone position or wind protection can make significant differences in final audio quality.
When wind noise can't be fully removed
Some recordings have wind noise so severe that complete removal isn't possible without destroying audio quality. In these cases, you have a few options:
Accept partial improvement
Sometimes reducing wind noise by 70-80% is enough to make dialogue intelligible, even if some rumble remains. Listeners can often mentally filter out remaining wind noise if the voice is clear enough.
Consider re-recording
If wind noise makes dialogue unintelligible and removal attempts create artifacts, re-recording might be more efficient than extensive post-production. This is especially true for scripted content where you control the recording environment.
Use it creatively
In some cases, wind noise adds atmosphere to outdoor recordings. Documentary-style content or nature recordings might benefit from subtle wind presence that reinforces the outdoor setting. The decision depends on your content type and audience expectations.
Conclusion
Wind noise doesn't have to ruin your outdoor recordings. Prevention through proper wind protection is always the best approach, but when you're working with existing recordings, both manual and AI-powered removal methods can restore audio quality.
For quick fixes on occasional recordings, high pass filters in Audacity provide a free solution that works well for moderate wind noise. For regular outdoor content creation or severe wind noise cases, AI-powered tools offer automatic processing that saves time while preserving natural voice characteristics.
The goal is clear, intelligible audio that serves your content. Whether you choose manual editing or AI automation, understanding how wind noise works and which removal methods match your situation puts you in control of your final audio quality.