How Do I Remove Room Reverb/Echo From Voice Recording?


You've finished recording your podcast, interview, or voiceover, and there's a problem: your voice sounds like it was recorded in a bathroom or empty hall. Every word echoes, creating a distant, unprofessional sound that makes your content hard to listen to. This is room reverb and echo, and it's one of the most common problems in home recordings.
The good news is that removing reverb and echo from voice recordings is achievable, even when the original recording conditions weren't ideal. This guide covers what causes reverb, how to identify different types, and practical methods for removing room reverb and echo from your voice recordings in post-production.
Understanding what you're dealing with makes the removal process much more effective. Reverb and echo are related but different problems, and each requires a slightly different approach.
What is reverb and echo (and why they're different)
Reverb and echo are both reflections of sound, but they behave differently in your recordings.
Reverb is the continuous wash of sound reflections that happens when your voice bounces off walls, floors, and ceilings. It creates a sense of space around your voice, making it sound like you're in a large room even when you're not. Reverb is dense and overlapping, so you hear many reflections at once rather than distinct echoes.
Echo is a distinct, delayed repetition of your voice. You say something, and a moment later you hear it again, slightly quieter. Echo happens when sound reflects off a single hard surface and comes back to the microphone after a noticeable delay.
Why recordings pick up reverb and echo
When you record in an untreated room, your microphone captures both your direct voice and all the reflections bouncing around the space. Hard surfaces like bare walls, tile floors, and large windows reflect sound strongly. The microphone can't distinguish between your voice and these reflections, so everything gets recorded together.
Small rooms with hard surfaces create the most problematic reverb. Bathrooms, kitchens, and empty bedrooms are common culprits because they have multiple reflective surfaces close together. Large spaces like halls or warehouses create longer reverb tails that can make speech sound distant and unclear.
Diagnosing your reverb problem (30 seconds)
Before you start removing reverb from your voice recording, identify what type you're dealing with. This tells you which removal method will work best for your specific situation.
Is the reverb dense and continuous, making your voice sound like it's in a large room?
This is typical room reverb. It's the most common type and usually responds well to reverb reduction tools.
Do you hear distinct, delayed repetitions of words?
This is echo. It's less common but can be more noticeable and distracting than reverb.
Is the reverb only on certain frequencies, making your voice sound hollow or thin?
This is frequency-specific reverb, often caused by room modes or standing waves. It might need targeted EQ work in addition to general reverb reduction.
Does the reverb get worse during pauses or quiet moments?
This suggests the reverb is present throughout but becomes more noticeable when your voice isn't masking it. This is easier to reduce than reverb that's baked into your voice itself.
Was this recorded in a very small room with hard surfaces?
Small, reflective rooms create the most challenging reverb to remove because the reflections are very close to the original sound, making them harder to separate.
Method 1: Manual reverb reduction with Audacity
What you'll need:
- Audacity (free, open-source audio editor)
- 10-15 minutes for processing
- Patience with trial and error
The traditional approach to remove reverb from voice recordings
Audacity doesn't have a dedicated reverb removal tool, but you can reduce reverb from voice recordings using a combination of EQ, gating, and noise reduction techniques. This method requires more manual work but gives you control over each step.
Step 1: Apply a high-pass filter
Reverb often contains excess low-frequency energy. Start by applying a high-pass filter to remove frequencies below 80-100 Hz. This won't remove reverb completely, but it cleans up the low-end muddiness that makes reverb more noticeable.
Go to Effect > High Pass Filter in Audacity. Set the cutoff frequency to 100 Hz and apply. Listen to the result and adjust if needed.
Step 2: Use noise reduction on reverb tails
This is a creative use of Audacity's noise reduction feature. The idea is to treat reverb tails as "noise" and reduce them.
- Find a section where you're not speaking but reverb is audible (like the end of a sentence or a pause)
- Select that section and go to Effect > Noise Reduction
- Click "Get Noise Profile" to capture the reverb character
- Select your entire audio track
- Go to Effect > Noise Reduction again
- Set noise reduction to 6-12 dB (start conservative)
- Adjust sensitivity and frequency smoothing
- Click "Apply"
Step 3: Apply gentle compression
Compression can help reduce the dynamic range between your direct voice and the reverb, making the reverb less noticeable. Go to Effect > Compressor and use gentle settings: ratio of 2:1 or 3:1, threshold around -12 dB, and attack/release times that preserve natural speech.
The reality check
While this method can help, it has significant limitations:
- Time-consuming: Multiple steps require careful adjustment
- Quality trade-offs: Aggressive processing can make voices sound thin or processed
- Limited effectiveness: Audacity's tools weren't designed specifically for reverb removal, so results are often incomplete
- Requires audio engineering knowledge: Knowing how to balance EQ, noise reduction, and compression takes experience
- May not work for severe reverb: If reverb is very dense or closely mixed with your voice, manual methods struggle to separate them cleanly
For mild reverb or learning purposes, this approach can provide some improvement. For professional results or severe reverb cases, dedicated reverb removal tools are more effective.
Method 2: Dedicated reverb removal plugins
Professional-grade solutions for echo removal
Several audio plugins are specifically designed to remove reverb and echo from voice recordings. These tools use advanced algorithms to separate direct sound from reflections, making them effective for removing room reverb from voice recordings.
Popular reverb removal plugins:
-
iZotope RX De-reverb: Part of the RX suite, this plugin analyzes your audio and removes reverb while preserving voice quality. It's considered one of the most effective solutions but requires a DAW and comes at a higher price point.
-
Acon Digital DeVerberate: A standalone plugin that offers real-time reverb reduction with adjustable parameters. It's more affordable than RX but still requires technical knowledge to use effectively.
-
Waves Clarity Vx DeReverb: Designed specifically for dialogue, this plugin can reduce reverb while maintaining natural voice characteristics. It's part of the Waves ecosystem and integrates with most DAWs.
How plugin-based removal works
These tools analyze the reverb pattern in your audio and create an inverse filter that cancels out the reflections. They identify the reverb's characteristics—how long it lasts, which frequencies it affects most, and how it decays—then subtract that pattern from your recording.
When plugins work best
Dedicated reverb removal plugins excel when you have access to a DAW and some audio engineering knowledge. They offer the most control and can produce excellent results, but they require:
- A digital audio workstation (DAW) like Pro Tools, Logic, or Reaper
- Understanding of plugin parameters and audio processing
- Time to experiment with settings
- Financial investment in the plugin software
For professionals working in studios or with complex projects, plugins provide the flexibility and quality needed. For content creators who need quick, effective results without technical complexity, AI-powered solutions offer a more practical alternative.
Method 3: AI-powered automatic reverb removal
The modern solution for removing reverb from voice recordings
AI-powered reverb removal tools eliminate the manual complexity entirely. Instead of wrestling with plugins, EQ settings, and compression, the AI analyzes your audio and removes reverb and echo from voice recordings automatically while preserving voice clarity and natural tone.
How it works
Tools like AudioEnhancer.com use machine learning trained on thousands of hours of audio to distinguish between your direct voice and room reflections. The algorithm identifies reverb patterns—whether it's dense room reverb, distinct echoes, or frequency-specific reflections—and intelligently removes them without the quality degradation that manual methods often introduce.
Key advantages:
- One-click processing: Upload your file, and the AI handles everything automatically
- Preserves voice quality: Maintains natural voice warmth and character while removing reverb
- Handles multiple reverb types: Works on dense room reverb, distinct echoes, and frequency-specific reflections in a single pass
- No technical knowledge required: No need to understand EQ, compression, or plugin parameters
- Consistent results: Same quality across all recordings, regardless of room size or reverb severity
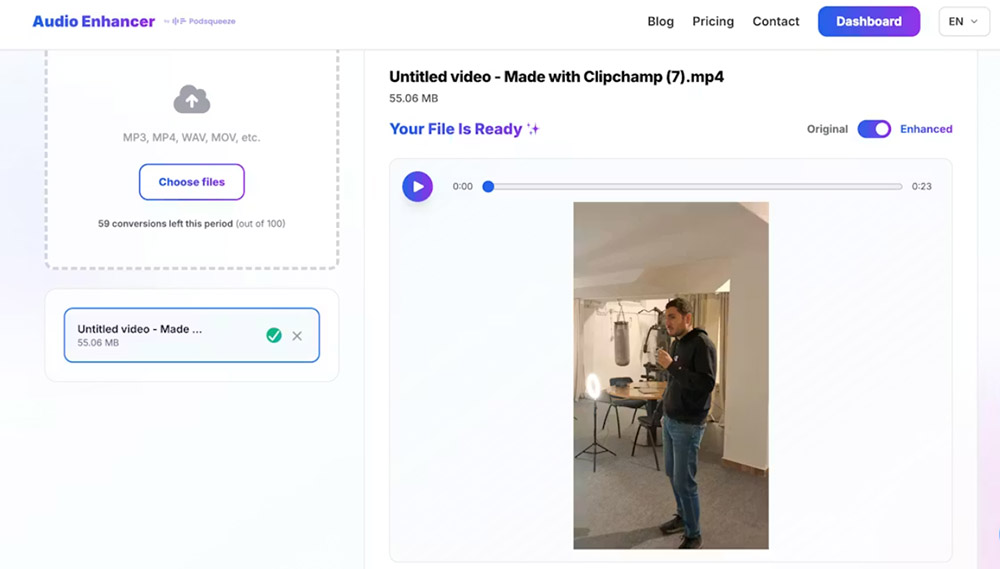
AudioEnhancer.com removes reverb and echo completely, even in extreme cases like small reflective rooms, large spaces with long reverb tails, or recordings where reverb is densely mixed with your voice. The platform handles both audio and video files, making it useful for cleaning up podcast recordings, video content, or interviews where room acoustics were problematic.
The AI processing maintains natural voice characteristics while removing all reverb and echo, regardless of severity. Whether you're dealing with dense room reverb, distinct echoes, or frequency-specific reflections, AudioEnhancer.com handles them all in a single processing pass. The platform works effectively even when traditional manual methods struggle to separate the direct voice from reflections, delivering professional results without any technical knowledge required.
Comparing the methods
Each approach has strengths depending on your situation:
| Factor | Audacity Manual | Dedicated Plugins | AI Tool |
|---|---|---|---|
| Cost | Free | Paid ($50-$300+) | Paid (often) |
| Learning curve | Steep | Medium | Minimal |
| Speed | 15-30 min per file | 10-20 min per file | 2-3 minutes |
| Quality | Moderate (with effort) | Excellent (with skill) | Excellent (automatic) |
| Control | High | Very high | Automatic |
| Best for | Learning, mild reverb | Professionals, complex projects | Regular content creation |
For most users, especially those without audio engineering experience, AI-powered tools like AudioEnhancer.com provide the simplest path to professional results. The platform removes reverb and echo completely in minutes, regardless of severity, without requiring any technical knowledge or manual configuration.
Best practices for removing reverb from voice recordings
These practices help you get the best results when removing room reverb and echo:
Start with the cleanest source possible
If you're planning future recordings, consider basic room treatment: add soft furnishings, rugs, curtains, or acoustic panels to reduce reflections. Recording closer to the microphone also helps because it increases the ratio of direct sound to reflected sound. However, AI tools like AudioEnhancer.com work effectively even with severe reverb, so you can still get professional results from less-than-ideal recordings.
Use headphones during review
Play back your processed audio through quality headphones to verify the results. Headphones help you hear the clarity and naturalness of the processed audio more accurately than speakers.
Archive your originals
Always keep an unprocessed backup of your raw recording. This lets you try different approaches or start over if needed. With AI tools like AudioEnhancer.com, you can process the same file multiple times if you want to compare results or apply additional processing.
Prevention: reducing reverb during recording
While this guide focuses on removing reverb after recording, prevention is always more effective than correction. Here are quick improvements you can make to your recording space:
Add soft surfaces
Rugs, curtains, furniture, and blankets absorb sound reflections. Even temporary solutions like hanging blankets on walls or placing a rug on a hard floor can significantly reduce reverb during recording.
Record closer to the microphone
Moving closer to your microphone increases the ratio of direct sound to reflected sound. This makes your voice louder relative to the reverb, which makes reverb removal more effective in post-production.
Choose better recording locations
Some rooms naturally have less reverb. Closets filled with clothes, bedrooms with carpet and furniture, or any space with lots of soft surfaces will produce cleaner recordings than empty rooms with hard surfaces.
Use directional microphones
Cardioid or supercardioid microphones pick up more sound from the front and less from the sides and back. This reduces the amount of room reverb that gets captured, making post-production removal easier.
Conclusion
Removing room reverb and echo from voice recordings is no longer a barrier to producing professional audio content. AI-powered tools like AudioEnhancer.com remove reverb and echo completely from voice recordings with a single click, delivering professional results in minutes without any technical knowledge required.
The platform works effectively on all types of reverb and echo, from mild room reverb to severe cases where reflections are densely mixed with your voice. Whether you're dealing with small reflective rooms, large spaces with long reverb tails, or any other acoustic problem, AudioEnhancer.com handles it automatically while preserving natural voice characteristics.
For content creators producing regular podcasts or videos, AI-powered reverb removal eliminates repetitive manual work and delivers consistently professional audio. Your audience will notice the difference immediately when reverb no longer distracts from your content. If you need to remove room reverb and echo from voice recordings, AI tools provide the fastest path to professional results.